

How to print to a local network printer from a Chromebook without installing any drivers
Have you ever been on vacation or at an event where all of the computers are set up, and you just want to print out a few documents, but the only computer you have access to has Chrome installed? Since it’s on your Chromebook, you don’t have any way to install drivers so that you can print to the printer, right? Wrong! As it turns out, it’s actually super easy to print to the printer without having to install any drivers or other software. All you need is your Chromebook, an Ethernet cable and your local networked printer! Here’s how it works!
Step 1 – Add the HP ePrint Service
- Open the Chrome browser and type in HP ePrint Service in the search bar.
- Find the HP ePrint Service app and click Add to Chrome.
- Click Add app.
- You may be prompted to allow the app access to your files and location – click Allow.
- The app will now be added to your Chrome apps and you can find it in your launcher (the icon next to the URL bar).
- Click on the app icon to open it.
- You should now see your HP printer listed under Local Printers – click on it to select it as your default printer.
- If you are printing a document, make sure that the Print option is selected from the drop-down menu at the top of your screen and click Print.
Step 2 – Add an HP ePrint Cartridge if needed
If you need to install an HP ePrint cartridge, follow these steps:
- Unplug the power cord from the back of the printer.
- Remove the ink cartridges from the carriage.
- Install the HP ePrint cartridge in the carriage.
- Plug in the power cord to the back of the printer.
- Turn on the printer.
- Wait for the printer to initialize, then install the ink cartridges in the carriage.
- When prompted, select your wireless network and enter your password to connect your Chromebook to your local network printer . Your printer will appear under Printers in the Chrome browser window with a checkmark next to it.
- Select Print (or Print Preview) from the menu bar to print or preview your document.
Step 3 – Print using Chrome
If you’re using a Chromebook, you can print to a local network printer without having to install any drivers. All you need is the IP address of the printer and your Chromebook’s built-in printing capabilities.
- Make sure the printer is turned on and connected to your home wireless network or that it has an active Internet connection (for wireless printers).
- Open Chrome.
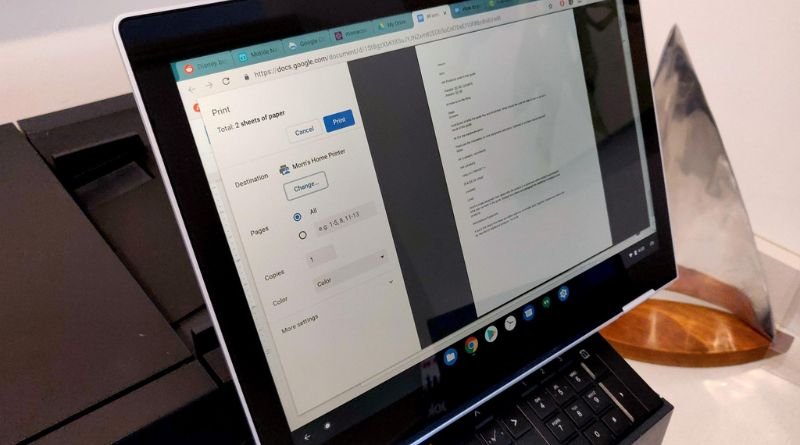
- Click on Chrome’s menu icon in the upper right corner of the browser window, then select Print Settings from the dropdown menu. A new tab will open with Print Settings options for selecting paper size, orientation, color options and more.
- Next, click on Printer or Paper under Destination at left side of page – this will display all available printers that are currently connected to your computer via USB cable or via Wi-Fi/Ethernet connection on same subnet as device running Chrome. You’ll see any printers shared by other computers on your network, or those set up to be shared on your own computer. Simply click on the name of the printer you want to use and choose Properties if needed before clicking Save & Close. You can also choose Send To Google Cloud Print by clicking that option and follow instructions for setup; once done, you’ll be able to use cloud-connected printers anywhere with access to internet connection!
- Once selected, click Print button in Chrome window at top of screen.